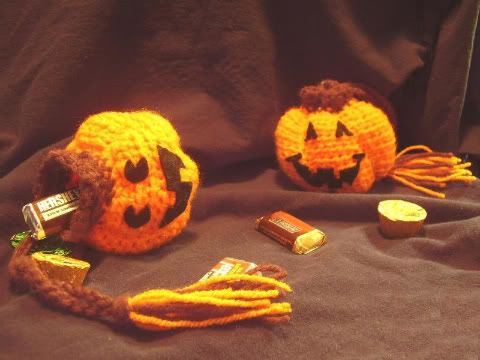
For this terrific installment, I present to you, my newest creation:
PUMPKIN CANDY BAGS!!!

I wanted to make something special for the little boys who live across the hall at my apartment complex. They are well-behaved little munchkins ( 2 and 4 years old, respectively), and I wanted to make something just for them.
To make these bags, I had to alter the Lion Brand pattern, Amigurumi Happy Pumpkin. I think you might have to create an account on the Lion Brand web site to see the pattern, although, looking at the finished results, it's worth it.
I stopped doing the pattern after row 14, and continued as follows:
15 - sc in ea sc around
16 - add in Brown, sc in ea sc around.
17 - ch 2, sc in 2nd st from hk. *ch2, sk1, sc in next st* continue working from * to * around.
18 - sc in next st. *1 sc in ch2 sp, sc in next 2sc* (continue from * to *around). sl st in beg sc. Fasten off.
Cord:
Sc 90. Weave through loops on pumpkin stem. Tie ends together securely. Make a tassel out of A and B. Attach to cover cord join knot.
There are different ways for making tassels. How do I do it? I start by wrapping the yarn 5 times around the palm of my hand. Hold hand horizontally, with thumb sticking out. start with the yarn end at the bottom of your hand. Wind yarn around your hand 5 times, ending again at the bottom of your hand. Cut end of yarn. Then, cut yarn in half - by cutting through the strands at the bottom of your hand. Do this again with your other color.
Fold your yarn strands in half. Lay your cord on top of the yarn strands, below the folded side. Take the cut ends of the yarn, and pass it through the loop made by the folded side, over the top of the cord. Pull the cut ends tight. Voila! There's your tassel!
I found that the way I make tassels is called a 'fringe tassel.' Here is a video tutorial at YouTube to show you how:
If you prefer a more precise tassel, I found a terrific tutorial at Laughing Purple Goldfish Designs
Thanks for reading, and I hope you enjoy my pumpkins!

No comments:
Post a Comment